Every summer my kids and I work on one art project a week where they learn about an artist as well as various art techniques and concepts. Join us for our journey into art and art history! The rest of the year we spend crafting and seeing where our creativity takes us!
We created alcohol ink stamped candle holders for Mother's Day and end-of-the-year teacher gifts this year. These were SOOOO easy to make! And took no time at all!
Here's what you will need:
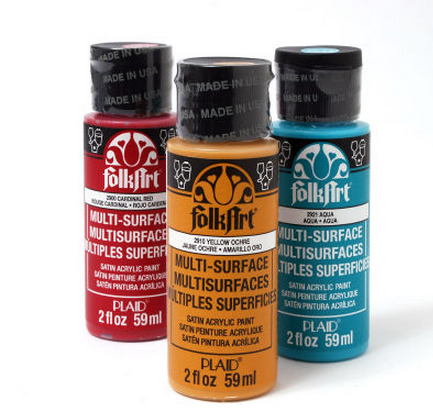
--Adirondack Alcohol Inks
--Alcohol Ink stamp handle
--felt pads to stamp with
--clear glass candle holder (I got ours at Dollar Tree and Target)
--votive candle (or LED votive candle)
We first played around with alcohol inks a couple years ago when we made all kinds of coasters. Check out this post for more in-depth information about playing around with alcohol inks.
For this project, I purchased a bunch of glass candle holders from Dollar Tree and Target (for $1.69 each). We used up to three colors of ink on the alcohol ink stamp pad (similar to this photo from our initial coaster project):
Then we simply stamped the ink around the glass. Let it dry and you have AMAZING results! It took maybe 10 minutes for the girls to each make 3 candle holders. This is definitely something you could make in bulk for party favors or gifts!
Here are the dramatic results! Forgive the multiple photos. You know how I LOVE LOVE LOVE to photograph glass art. Unfortunately, it was a really cloudy day when I took these or they could have been even more fabulous. Oh well. ;-)
Here are the smaller versions from Target that we also gave to people:
I also bought a clear glass plate from Kohl's (for $10) and used alcohol inks on the bottom of the plate and gave it to my mom for Mother's Day. I will have to make more of these because I think they are so pretty!
I did seal the bottom of the plate with a coat of polyurethane spray so that she could wash the plate if she used it for serving desserts or anything like that. I did not seal the candles. We just let the recipients know that they shouldn't leave them outside or get them wet.
Our house is located on the corner of our subdivision. It's actually a really busy corner and one of just a few access points for our neighborhood, so MANY people turn in and drive by our front yard everyday (sometimes multiple times a day). I feel a certain amount of responsibility to represent our neighborhood well and always like our front landscape bed to look nice. Plus, I just enjoy making our yard look pretty! Here is this year's version of our garden art!
I feel I have finally discovered how to make a DURABLE painted flower pot! One of our pour-paint pots from last year did survive and I have that by our front door this year:
I didn't seal the inside or the outside of our flower pots last year with pottery sealer. And I didn't seal the outside right away with polyurethane spray so by the end of the summer the paint was bubbling up and peeling off. I learned from this and have improved our technique this year.
The paint we used this year would not be good for pour-paint unless thinned because it is too thick to run down the sides of the pot. You would also have to buy quite a bit of paint to achieve the pour paint look. HOWEVER, this paint is EXCELLENT for painting designs on the pot!
Both of these brands of paint worked great! And have withstood over 5 inches of rain in the month of June alone. The only difference is that the Folk Art covers more quickly and the Patio Paint requires multiple coats to cover completely.
Before we did anything this year, I sealed the inside and the outside of our pots with Pottery Sealer like this from Michaels:
Photo credit: Michaels
Here are our painted masterpieces for this year:
My painted pot
My 10 year old working on her pot. She came up with this absolutely AMAZING impressionist-type paint style that turned out just GORGEOUS! I cannot begin to tell you how much I love love love this pot! And how impressed I was with it!
Her work space!
Finished pot in the landscape bed.
After we painted the pots and they dried, I sealed them with the pottery sealer again and then one last protective coat of polyurethane spray. That seemed to do the trick as this paint has lasted amazingly well so far this summer!
I also used the paint above to paint this garden lantern:
It was white when I purchased it from Michael's. I used alcohol ink on the glass. You can see it partially done in the photo below:
I painted the lantern and then sealed the whole thing with polyurethane spray. The alcohol ink has stood up to the weather elements, but it has faded a bit from the sun. Overall, I'm pleased with how well it's standing up to nature.
The landscape bed when we first finished it this spring.
We also created a couple pots to gift to people. I think these turned out really fun!
My 8 year old's pot.
I used our "created by" stamps to label the bottom of the pots by painting the stamp with the patio paint and then spraying the bottom with polyurethane spray.
Happy Fourth of July! Hope you all have a wonderful holiday this week!!
Okay, I get it. There are some people in the world who just aren't crafty (or THINK they aren't crafty). So they go to the store and buy character Valentines and send them to school with their kids. No problem! Not everyone has extra time to spend traipsing around buying craft supplies for Valentines. Some people would rather pull their hair out than supervise their children making handmade Valentines. I don't blame you sometimes! BUT. I am here to tell you, you really CAN make handmade Valentines! With minimal supplies too! And minimal cost! And if you have grade school age children, minimal help! Now, how does that sound?? Are you sold yet? Well, let me know show you what we did this year for our Valentines!
First of all, Pinterest is your friend! You can find a million EASY Valentines on Pinterest and most of them are just free printables, add the "treasure" (either candy or a pencil or whatever) and you're done! But I have crafty kids who wanted to take matters into their own hands! So off they went to search on the iPad.
My 10 year old Minion-obsessed fourth grader found these!
Isn't that cute! But, of course, she didn't want to just print these out. She wanted to draw it herself! So she drew her picture, we shrunk them down and printed four to a page. You can do this with ANY DRAWING! Even a toddler/preschooler can make a Valentine picture and you can turn it into a Valentine, just like that!
Here's how she finished them:
All you need is your small printed drawings, some paper cut slightly bigger than the drawings (we used scrapbook paper, but you can use construction paper or anything really!), glue dots (or a glue stick, school glue, etc), and a paper cutter or scissors.
My daughter just put a glue dot in each corner of the drawing page.
She taped a pencil to the back (bought at the dollar area at Target for 50 or 75% off in the off season--8 pencils in a pack) and wrote her greeting.
Done and Done. Now, that was wasn't too hard, was it?? ;-) I hear all the time from people when they see some of our projects that they just aren't crafty and could never do what we do. Honestly, sometimes it's not difficult at all to do something handmade! And it always has such a great WOW factor when you give someone something you made yourself, versus something store-bought.
Okay, this next project maybe is for the bit more advanced crafter. But I have to brag. Ella made this ALL BY HERSELF! It's her valentine box to house her valentines at school. She saw something like it on Pinterest and created her own version. Isn't this the most adorable thing ever!!
I love all the details she put into it! The buttons glued on. The teeth taped in the mouth. The pipe cleaner hair. The three-dimensional quality of this is AMAZING! The only thing she had help with was cutting out the mouth because we had to use an Exacto knife.
Now, onto my 8 year old! She also created her own Valentines this year. She came up with this all on her own! I think she was inspired by this pin:
She used Fabri-tac to glue two foam hearts together (you can get these at Michael's or Target). Then she stuck the Smarties on with glue-dots.
Finished it off by making little heads out of puff balls, googly eyes, and pipe cleaners. She attached the puff ball to the tip of the Smarties with Fabri-tac--trying not to get the glue near the candy. ;-)
She wrote her greeting on the back. Pretty awesome that she did this without any supervision at all!
And finally, my son's preschool class is exchanging Valentines. I wanted to do something I could make quickly without a lot of effort. He isn't into crafting (yet) so I made these on my own. But you certainly could have your kids help you! I did find this on Pinterest here.
All you need is some paper, bouncy balls, and favor bags.
Cut out a heart shape, write, "You're out of this world" on it. I wrote my son's name on the back.
Because the bouncy balls are rubber, it is kind of difficult to actually attach them to the paper. So I put them in favor bags and it worked great. So easy! This took me maybe 30-45 minutes total to do.
Making your own Valentines definitely doesn't have to difficult! You just have to find an idea and run with it. Many of them aren't even time-consuming! Give it a try!
We are living amidst the Polar Vortex. I know I live in Minnesota where we almost expect this weather in winter, but there are so many places in the United States right now where families are having snow days and "cold" days. Places where the people aren't used to being stuck in the house most of the winter. Just this morning, a friend who lives in Iowa posted on Facebook:
We are out of ideas, patience, and positive attitude. Please send spring soon, or at least temps we can play outside in.
This post got me thinking and inspired me to write this blog post! Just how can parents combat being stuck inside for days on end because it's too cold to go out and play, even for a few minutes? The answer can be summed up in two words: Sensory Play!!
Everyone has a sensory diet whether we realize it or not!
Sensory diet is simply what we do during our day to help our bodies feel calm and happy. Some people need to exercise to keep their bodies feeling in balance. Some people do yoga. Some people need to just get away from everyone else and read a book for a bit. Others like to take a calming bath. As adults, we have just naturally discovered what it is that makes us feel "normal" and we do those things on a regular basis. Kids don't always have the benefit that comes with age and they don't understand that they need to get their energy out to keep their bodies feeling calm. The direct result of this is bouncing off the walls!
I have sensational kids. And although, they are fantastic in the literal definition of "sensational", what I really mean is that they are sensory-sensitive kids. My 10 year old daughter is very sensory-seeking and tactile and my son is VERY sensory-seeking. These two need regular sensory "input", as we refer to it, in order to feel calm and to regulate their bodies. Kids receive this input through vestibular (the sense of movement, centered in the inner ear) and proprioceptive (sensations from joints, muscles and connective tissues that lead to body awareness) activities. This means they LOVE getting out and running around or doing obstacle courses through the house. But sometimes Mommy is just plain tired and wants things to be quiet. Though my kids are especially sensitive to pent up energy, all kids can get squirrelly in the winter months when they are stuck having indoor recess or never leaving the house. This website has a great, relatively succinct summary of the sensory diet. Even though some kids have more sensory needs than others, ANYONE can benefit from this knowledge. (By the way, on a sidenote, I've read articles recently about how some schools--was it in the Netherlands?--take brain breaks more often during the school day so their kids can be active and studies show these kids learn better. There is definitely a connection here and I wish more schools would understand this! Instead, more and more kids' recess time is being diminished in favor of more desk work....anyway, I digress....)
What can you do INSIDE YOUR HOUSE to help your kids?
If you just can't summon up the energy to do one more crazy running game or obstacle course inside, try some of these other ideas to help the kids work out some of that pent-up energy in quieter, more subtle ways. Many of these will help do the same things that running around outside does. It will give your kids "input" and help make their bodies feel more relaxed and calm.
For toddlers/preschool age (click the titles to go to links): Sensory Bins
Bath-time fun
I don't really have any posts on bath fun, but there are a million ideas on Pinterest for this. Here's one great blog written by Crystal, who writes Growing a Jeweled Rose filled with water activities called: Bath Activities for Kids. Growing a Jeweled Rose is one of my favorite blogs. This mama really knows her sensory stuff! And comes up with A-MAZING recipes for anything and everything. CHECK.IT.OUT.NOW! Splashing around in the water will give your kids some of the same sensory input as running around outside!
Water Play
Again, I don't have specific posts for this. But throw some water in a bin on the kitchen table, grab some measuring cups, funnels, and more. Let them make a mess! It's just water! Or click on "water play" for more activity ideas. Adapt some of the outdoor play for inside!
Fingerpainting
You can even try a mess-free version on a window! They get sensory input and you don't have the mess! Win win for everyone!
Shaving Cream
You can add any toys to shaving cream and it is a great sensory experience. You can color it with liquid watercolors or food coloring. You can play with it in the bathtub too. You can buy it at the dollar store. Just wipe up the mess when they are done!
Fun for all ages! Instant snow can be ordered online. I've even found it at the Dollar Store! Better yet, this time of year, grab a bucket or bin and get some snow from outside! You can even dump some in the bathtub to play with. It's free and we have an over-abundance here. Bring the snow fun indoors where it's warm! You can even talk about how solids turn to liquids. Build in some learning with the sensory fun, since they've been missing out on school anyway. ;-)
Glow activities These are good for toddler/preschool as well as grade school age kids!
Do you have a blacklight? If not, you can find them at Walmart or Amazon for pretty cheap. There are so many fun glow activities!
Even if your kids take a break to watch a tv show or a movie, you can hand them some "thinking putty" to play with and it will help work out some of that pent up energy! We have no less than 6 canisters of this in our house. Beware, it does NOT come out of carpet or fabric easily! But this is all the rage with the fourth graders at my daughter's school. The teachers let the kids play/fidget with it in class. It helps them stay focused and get some of their wiggles out. Our local educational toy store carries a ton of this! But if you don't have a store near you with it, you can find it on Amazon too.
If You Have Room in Your House: Tie a beach ball to a piece of elastic and hang it from the ceiling/a railing and hit it around:
I don't have any photos of my big kids playing with this. But they LOVED it as much as my little guy! I can't tell you how many beach balls we've popped with this activity! Ha! Luckily, I stock up on beach balls at the Dollar Store when they have their summer gear out.
If you don't have the time to make a swing yourself or you can't find the bungee chair (usually they can be found in late summer/end of fall at Target), you can purchase a swing at Hearthsong.
A couple other ideas (all of these were suggested to me by a certified Occupational Therapist):
--Grab a sturdy blanket, have your child lay in it on one end. Roll them up and then unroll them! Great input! (obviously, it goes without saying that you should be safe with this activity and adult supervision applies!) If you happen to have a gym mat at your house (yes, we do!), fold it in half. You can gently squish them inbetween the two halves. Both
--Use a yoga ball or large playground ball--Have the child lay on it on their belly and roll forward and backward over it. You can use this in various ways...one idea: do a puzzle this way. Have the pieces on one side and the puzzle on the other. Child can grab a piece or two of the puzzle, roll over the ball, put pieces in puzzle, roll back for more pieces. Or building with blocks. Whatever had pieces that you put together.
--Bear walk (http://everydaylife.globalpost.com/muscle-tone-activities-toddlers-preschoolers-14475.html), crab walk, wheel barrel walk around the house.
And if you're interested in further reading on sensory diet, check out these great books! They are insightful even if you don't have sensory-sensitive kids! They will help you understand how the body reacts to its environment and how sensory stimuli can affect our bodies!


